
Welcome to ajirababa.com! In this article, we explore the fascinating world of Photographs Interpretation for Form Five Geography students. Photographs provide a valuable source of information, capturing detailed visual representations of our environment and allowing us to analyze and interpret various geographical features. This topic delves into the techniques and principles of interpreting photographs, enabling students to identify landforms, vegetation, human settlements, and other crucial elements. Through careful observation and analysis, students will develop the skills necessary to draw meaningful conclusions from photographic data. Join us as we journey through the essentials of Photographs Interpretation, enhancing our understanding of geographical landscapes and their dynamic processes.
TOPIC: PHOTOGRAPHS INTERPRETATION
INTRODUCTION TO PHOTOGRAPHS.
Photographs are the true image pictures showing truly appearance of the earth’s surface objectives on the flat bodies of special pieces of paper taken with the use of a camera and chemically printed.
Or
Are the pictorial representations of the remote sensed data recorded on film in a camera then chemically printed on special pieces of paper.
With respect to the definition given, photography is produced as the image of the object captured and recorded with a camera on a light sensitive film. The film by then is developed in a developer machine to remove darkness in it to develop brightness of object’s image. The image in the film by then printed on a special paper using chemicals to develop clear true image pictures. The camera recording the images of objectives can be mounted on theground or aerial platform.
A person who takes photography with the use of a camera is called photographer; and the art of producing these pictures is known as photography.
Photographers have potential significance in geographical studies in a number of ways. For in stance; they are used to asses the geographical facts of respective areas. Alternatively used to make storage (recording) of the geographical details of pieces. It has to bear in mind that, land details change with time,But a photography once produced remains unchanged. Some of the geographical details that can be assessed from photographs include; relief, land use, drainage features, settlement and vegetation.
TYPES OF PHOTOGRAPH ON GEOGRAPHICAL PHENOMENAL.
Photographs are not all the same as images of objects on them observed to have varied appearance. The varied appearance of image objects are determined by the orientation of the camera axis (Photographic views). Thus; photographs are classified according to the appearance of the images on them relatively to the orientation of the photographic views. Also; photographs are classified by considering the nature of platform from which the camera and photographic view has been mounted and set. By regarding the two categorizing factors, the numerous photographs are broadly classified into the following types. · Horizontal/ground photographs.
· Vertical aerial photographs.
· Oblique photographs.
· Satellite photographs.
GROUND (HORIZONTAL) PHOTOGRAPHS
These are the photographic prints of which whose images have been captured and recorded on film as photographic views horizontally set with camera mounted on the platform of the ground I e the photographic view by camera towards the object is from the surface level of ground the camera is placed fixed on a tripled stand very close to the ground comparatively Ground photographs are also known as terrestrial photographs.
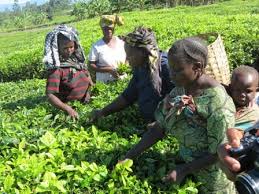
The horizontal photographic view may target a particular object or the general scenery of the area it is thus; the horizontal photographs may show major object or the general scenery of the area basing on this; horizontal photographs sub divided into two
· Close up ground photographs
· General view ground photographs
Close up ground photographs.
These photographs are produced as the photographic view focuses on a major item such as a tree a person an animal a house and others of the same reflection The particular item obscures most of the other details behind it and thus the picture shows a died ground These photographs are alternatively known as particular view photograph
General view ground photographs.
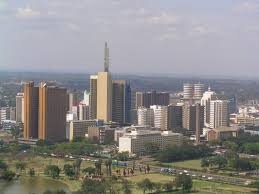
These are taken by the photographic views with mounted camera focusing the general scenery of areas commonly; the photographic view are not intercepted by an obstacle as a result all objects at an area recorded on the film and printed to appear on the photo by getting progressively smaller from the fore ground to back ground hence; the photograph give the general view of the scenery this photograph shows horizons.
Horizon means part of the photograph where the land and sky apparently meet.
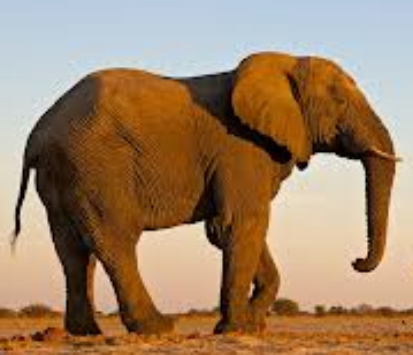
Close up ground photograph
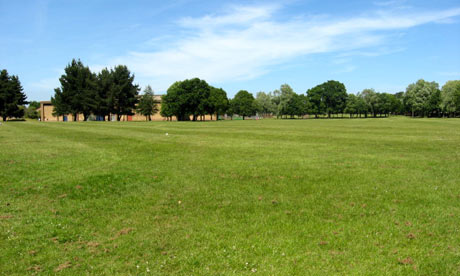
General view ground photograph
Characteristics of ground photograph.
· On the ground photographs particularly objects get progressively smaller from the fore section to back section and horizons likely to be seen.
· The ground close up photographs do not show horizons.
· They cover smaller areas of ground.
· They do not make uniformity coverage of the ground represented.
· Scale changes by getting progressively smaller from the fore ground to back ground due to the non uniformity coverage of the ground.
· They show front views of the object’s image.
· Ground photographs are taken from surface level.
Strengths of the horizontal photographs.
· The objects on the photograph are clearly seen.
· It is easy to interpret as the image of objects is clearly observed on the photograph.
· They are less expensive to be produced compared to other types of photograph.
· Comparatively; horizontal photographs are the most familiar pictures to people compared to other forms of photographs.
· Ground photographs can be used as an aid to field sketching.
· They give more easily instant data of areas.
Setbacks of the horizontal photographs.
· Cover smaller area size of the ground. It is thus; enables people to make analysis of geographical features of small areas.
· Subjected to scale distortion as image of objects as well as ground coverage get progressively smaller from the fore ground to back ground this makes difficult to asses the used scale.
· They are not potential for assessing the measurement of the geographical features like; area size and distance due to scale distortion.
· Not all objects are seen on the photograph as some are hidden by others
· They are not potential for map making due to scale distortion and coverage of smaller areas .
Note
Horizontal photographs are produced purposely to have an aid for making geographical analysis and description of the smaller areas

VERTICAL PHOTOGRAPHS
These are photographic prints whose images of objects have been captured and recorded on film as photographic views vertically set with camera mounted on the platform of the aircraft. i.e. the earth’s surface is viewed vertically from the air craft with the camera axis at almost right angle of 90 though the angle can be displaced to either 87 or 93 due to the movement of the aircraft
According to the history the first vertical aerial photograph was taken from a balloon by a French man in 1855 and were much improved in Germany However; the importance of these photographs for map making became during the first and second world wars when maps were needed for military purposes.
Vertical aerial photographs have less scale distortion and mostly used for map making and assessments of the geographical features and measurements.
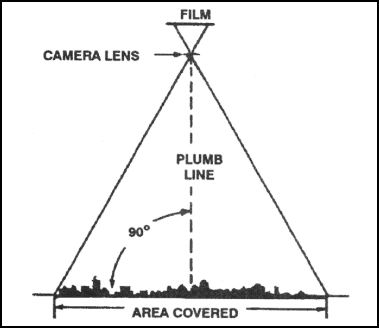
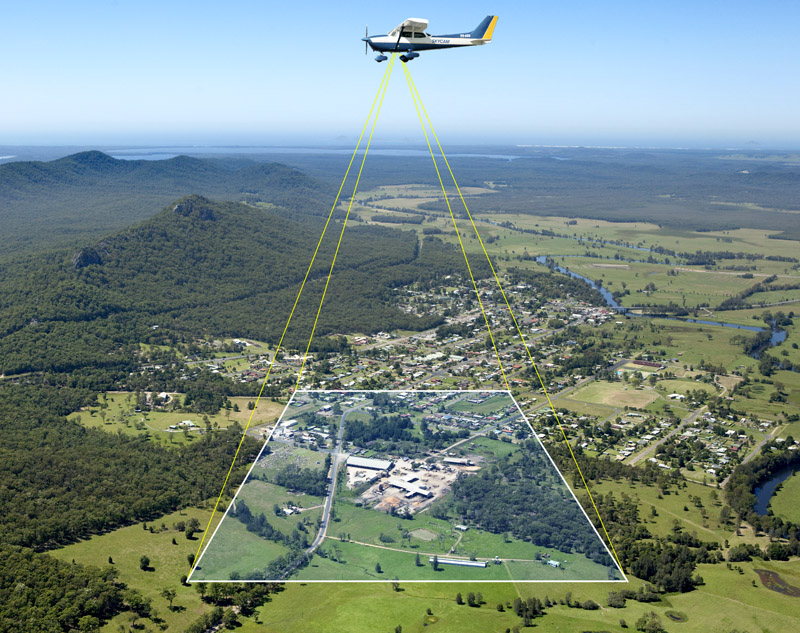
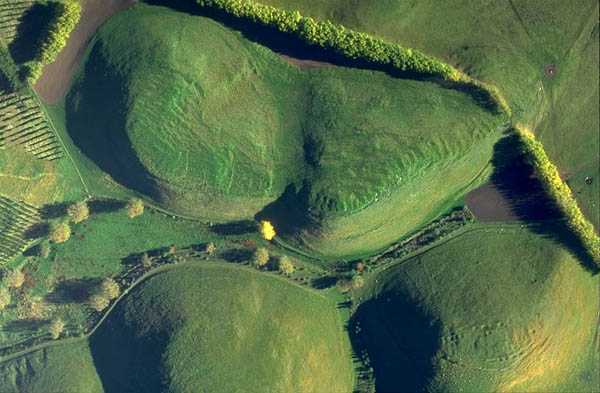
Characteristics of the vertical aerial photographs.
- They display the top view of the objects as photographic view vertically directed towards the landscape.
- The image of objects on photographs appear less distorted in size.
- They are taken with camera axis vertically directed.
- They make considerably uniform coverage of ground.
- They are less subjected to scale distortion.
- The change of scale by getting progressively smaller is from the centre to outwards
- Advantages of the vertical aerial photographs
- They have less scale distortion following the uniformity coverage of the landscape on the photo
- It is possible to judge the photo scale as there is uniformity coverage of the landscape on the photo and images are less distorted in size. Scale is assessed by relating the corresponding measurements between the photograph and ground or by relating the focal length of the used camera and flying height of air craft above the ground
- Cover larger area of the ground. It is thus; people make geographical analysis of the wider geographical areas
- They are mostly used in map making because of covering wider areas and less scale distortion
- It is possible to make photogrammetric i. e. They are used to asses measurements of the geographical features as whose scale almost is less distorted
- Vertical aerial photographs can be viewed stereoscopically. i. e. images can be viewed in three dimensions with the use of a stereoscope
- They provide instant data particularly those which can not be given by the horizontal photographs e. g. the volume of moving objects at a time such as cars ships etc
- They can provide details of the impenetrable or remote areas which can not be visited by ground surveyors or photographed horizontally. e. g. swampy land dense tropical forest, desert interiors ice caps and others of the same consideration
- Disadvantages of vertical aerial photographs.
- Objects are not clearly seen as very huge area covered and only the top view of objects are displayed
- It is some how difficult to make photo interpretation as objects are not clearly seen
- They show only the top views of the land objects taken
- The taking of the vertical photographs is affected by the adverse weather E. g. cloud cover during the rainy season
- The taking of the vertical photographs is still an expensive process
- Minor detail is often lost in vertical aerial photographs and need to be supplanted by ground survey
- Because of being non selective; vertical photographs are wasteful as show masses of details some of which may not be needed in the analysis and description
OBLIQUE PHOTOGRAPHS
These are the photographic prints of which images have been captured and recorded on film as photographic views tilted with mounted camera from either aircraft or elevated ground. Tilting of the aircraft can be from low oblique photographs which only show the surface. Tilting of the photo graphic view from high height produces the high oblique photographs which commonly show both horizons and surface. By regarding from where the tilted photographic view set; oblique photographs are divided into two and include;-
· Ground oblique photographs/low oblique
· Aerial oblique photographs/ high oblique
Ground oblique photographs
These are the photographic prints whose images have been captured and recorded on film as photographic views tilted with mounted camera from elevated ground e.g. from a hill looking down. These make smaller coverage and are termed as low oblique aerial photographs.
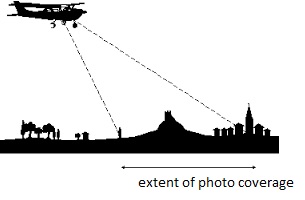
Aerial oblique photographs.They are the photographic prints of which whose images have been captured and recorded on film as photographic views tilted with mounted camera from aircraft
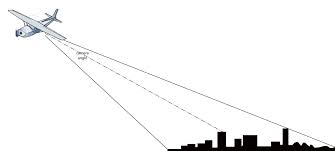


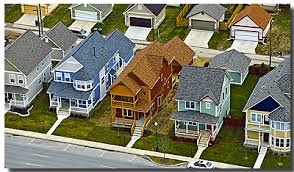
Characteristics of oblique photographs.
· Images of objects on the photograph get progressively smaller form the fore ground to back wards.
· Subjected to scale distortion as there is no uniformity coverage of the ground on the photograph.
· The change of scale by getting progressively smaller is from the fore section to back section.
· Show both side and top views of the objects.
· Images on the photo are highly displaced as they occupy apparently linear position
Advantages of the oblique photographs
· Objects on the photograph are relatively large in size. Hence they are clearly seen.
· It is easy to interpret the photograph as images of objects in them are clearly viewed.
· They show both side and top parts of the objects.
Disadvantage of oblique photographs.
· They suffer from the problem of image displacement i.e. the objects on the photo are observed to occupy the linear position.
· They are subjected to scale distortion as objects get progressively smaller from the fore ground to backwards. Hence it is difficult to judge the used photo scale.
· They are not used for map making due to scale distortion.
· They are not potential for assessing the measurements of the geographical features.
Differences between the oblique and vertical photographs.
· Vertical aerial photographs cover larger area size of the ground, while; oblique aerial photographs cover smaller area size of ground.
· Vertical photographs show only the top view of the objects; while oblique photographs show both side and top views of objects taken.
· Oblique aerial photographs show both the surface and horizons while the vertical aerial photographs show only the surface.
· Oblique aerial photographs show displaced images; while the vertical photographs do not show displace images.
· Oblique photographs are much subjected to scale distortion; while the vertical aerial photograph is less subjected to scale distortion.
· The change of scale by getting progressively smaller is from the centre outwards on vertical aerial photographs while on the oblique aerial photographs are from the fore section to back section.
· Vertical aerial photographs display much smaller images of the objects; the oblique photographs display relatively large sized images of the objects.
· Vertical aerial photo is used in map making while the oblique aerial photo is not used in map making.
SATELLITE PHOTOGRAPHS
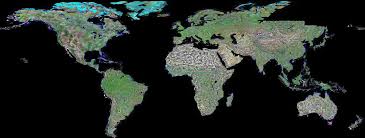
These are the photographic prints whose images recorded (taken) electronically with the use of a scanner as a sensor placed in a satellite.
Or
photographs of earth and other planets made by means of artificial satellites in which multi spectral scanners installed (equipped)
The scanning view is directed towards the land space from the satellite operating in a very high altitude. Satellite operates at vertical distance of 900km above the mean sea level.
The satellites are equipped with sensitive receptors called multi spectral scanners which reflect details from the earth’s surface. The data recorded by multispectral scanners are relayed (sent) electronically to ground stations where with other electronic machines the imaginary data processed to develop photographs which give much details up on meteorological condition, geology, soil, pollution, forests, and crops.
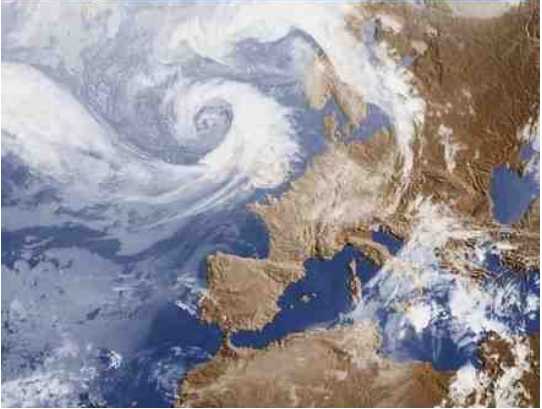
The satellite imagery have daily used for weather for forecasting, provide information for mapping, land use and plotting the landscape details and other uses.
Types of satellite imagery.
Satellite imagery are recognized by considering types of data they display.
(a) Land sat satellite imagery: – these provide details about earth’s resources.
(b) Meteosat satellite imagery: – these provide meteorological data for daily weather forecasting.
Uses of satellite imagery.
· They are used to forecast the weather conditions likely to occur in some days to come.
· They are used to monitor forest fires, ice flows and ocean currents.
· They are used for resources assessments. i.e. satellite photographs are used to reveal the resources which present in different parts of the earth’s surface.
· They are used for mapping purposes. The boundaries of countries, continents and other features which appear on maps mostly traced from the satellite imagery.
· They are used for environmental management.
· Satellite imagery facilitates scientific studies. For instance; satellite imagery used to detect sea surface temperatures.
· They are used for military purposes. Satellite imagery provide secure communication for the military.
Disadvantage of satellite imagery.
· They are most expensive to be produced as it can be compared to all other forms of photographs.
· They are difficult to be processed.
· They require high skill to be interpreted because of their colour composites.
IMAGE DISPLACEMENTS, SCALE DISTORTION AND PARTS OF THE PHOTOGRAPHS.
IMAGE DISPLACEMENTS.
(PARALLAX)
On some photographs, the images of objects do not appear uprightly vertical as are in real life. They are observed to appear displaced by occupying apparently linear position. This in the study of photographs is knows as image displacement. It is thus; image displacement is defined as the photographic setting of objects on the photo to occupy apparently linear position.
The scientific term used to describe and explain image displacement is known as parallax. Hence; parallax is defined as the apparent shift in position of an object on the photo with respect to reference point. By reference point refers to the position of an object on the photo.
Causes of image displacements.
(a) The change of viewing position
If a photograph is taken by the tilted photographic view, the images of objects on the photo are made to have both top and side views and thus; appear displaced. With respect to this; oblique photographs are the ones which have highest degree of image displacement compared to horizontal and vertical photographs.
(b) Height of the viewed objects.
This makes variation in the degree of displacement of objects on a photograph. The higher objects are more displaced that the smaller objects on the photo. For instance; the high buildings on oblique photographs appear more displaced compared to the smaller buildings.
(c) Position of the object on the photo.
Usually objects at a nadir (principle point) are less displaced compared to those that are away from the Nadir (principle point) this is observed on vertical photographs, the objects on the fore ground have low degree of displacement compared to those on the back ground. But this factor is mostly considered to objects of the same height.
Note
Image displacement is one among the sources for image displacement on photographs.
SCALE DISTORTION.
On photograph scale is changed by getting progressively smaller from one section to other sections. This in the study of photographs is referred as photo scale distortion. It is thus; photo scale distortion defined as the variation in relation ship (ration) of distance between the photograph and ground by getting progressively smaller from the principle point outwards on vertical photographs or from the fore ground to backwards on horizontal and oblique photographs. However; the degree of photo scale distortion is much higher on oblique and horizontal photographs than on vertical photographs.
CAUSES OF SCALE DISTORTION.
Scale distortion is made by the following causal factors.
(i) Non uniformity coverage of the ground.
The section on photograph that covers small area is subjected to large scale, while that covers wider area is subjected to small scale.
(ii) Distortion in size of the objects.
Objects that appear apparently smaller make small scale compared to those which appear apparently larger.
(iii) Image displacement.
More displaced objects make small scale compared to objects which are less displaced.
7.2 PARTS OF PHOTOGRAPHS.
Photographs are used to make description and analysis of the geographical features observed with reflection to be actual areas represented. The features described should give their position location on the photographs. The location position of the features is by pointing out parts of the photographs where the features are found. It is thus important to understand the major parts of photographs in such a way that the features can be described and analyzed clearly.
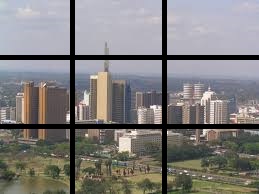
Parts of photographs are recognized by dividing the photographs horizontally and vertically into three dimensions
Horizontal division makes a photograph to have three equal parts of; fore ground, middle, ground and back ground.
| Back ground |
| Middle ground |
| Fore ground |
Vertical divisions makes a photograph to have three equal parts of; left, centre and right.
|
Left |
Centre |
Right |
If both horizontal and vertical divisions combined, a photograph is made to have nine equal parts. The main parts include the following:-
(a) Fore ground:
This develops; left fore ground, centre fore ground, and right fore ground.
(b) Middle ground:-
This develops; left back ground, centre ground and right ground.
(c) Back ground:–
It develops; left back ground , centre back ground and right ground.
|
Left back ground |
Centre back ground |
Right back ground |
|
Left middle ground
|
Centre middle ground |
Right middle ground |
|
Left foreground
|
Left back ground |
Right fore ground |
Note:
The nine parts of the photographs as already pre described have the following vital significance.
· They are used for position location of the features on the photograph in the course of making description.
· They are considered for diagrams drawing from the photograph. i.e. they are used to place features on the diagram at right positions.
VERTICAL PHOTOGRAPHS SCALES.
Photograph is much smaller in size, while objects represented are much large in size. It is thus; photographs being much smaller subjected to have considerable relation of distances to the much large objects represented. This is what referred to photo scale. It is thus; photo scale is defined as the relation ship of distance between the photograph and their respective object represented.
The scale of a photograph is not much up on the decision of the photographer. It is thus; once a photograph produced, its scale should be assessed to allow further assessment of the geographical features. In this aspect; it is possible to asses’s scales for photo graphs which make uniformity coverage of ground. Hence it is difficult to assess specific scale for horizontal and oblique photographs whose specific scales can be assessed.
Photo scale extremely varied in size and the most common types are large and small photo scales depending on the size of the ground covered. Coverage of smaller area make large scale, while coverage of wider area make small scale.
The scale of the vertical photograph relatively to the size of the ground covered is the function of the following determinant factors:-
· Focal length of the camera used.
· Flying height of the air craft above the ground.
PHOTO SCALE EXPRESSION.
The assessed scale can be expressed in one of the following techniques.

II. In ration form. 1:50,000
III. In unit equivalent. e.g. 1cm on the photo = 0.5 km on the ground.
IV. In statement; e.g. 1cm on the photo represents 0.5 km on the ground.
PHOTO SCALE DETERMINATION.
Scales of the vertical aerial photographs are determined by two methods and they include the following:-
1. By relating the corresponding distances between the photograph and ground. The distances should be measured and the application is as follows:-
| Photo scale = Photo distance Ground distance |
Ground distances obtained in the one of the following two ways:-
· By making actual measurement at the photographed area.
· The use of scaled topographical map representing the same photographed area.
Example:-
Ground distance from area A to B is represented by 5cms on the photo. The same ground distance is represented by 10 cm on a topographical map drawn on the scale of 1:50,000. Determine the photo scale.
Solution.
The photo scale is determined as follow:-
| Photo scale = Photo distance Ground distance |
According to the given data:-
· Photo distance = 5 cm
· Map scale = 1:50,000
· CD on the map = 10 cm.

Thus; the photo scale; 1:100,000
2. By relating the focal length and flying height above the ground. The technique (method) is applied as follows
![]() .
.
While:-
· F = focal length of the used camera.
· Hg = flying height of the air craft above the ground.
Note:-
Flying height of the air craft above the ground does not on the photography. What directly appears on the photograph is the flying height of the air craft above the sea level. It is thus; the flying height above the ground is obtained by subtracting the ground height from the flying height of air craft above the sea level.
| Hg = H – g |
Where by:-
· Hg = The height of the aircraft above the ground.
· H = Height of the air craft above the sea level.
· g = Ground height above the sea level.
Example:-
Determine the scale of the vertical aerial photograph taken with the camera of 6” if the flying height are 7,000m and ground height 4,000m respectively.
Solution:-
Scale for vertical aerial photography up on the given data is determined as follows:-
| Photo scale = f Hg |
While; Hg = H – g
According to the given data:-
f = 6’
H = 7,000m
g = 4,000m
6”
7,000m – 4,000m
15 cm
3,00m
15
300000
1
20,000
Thus; the photo scale; 1: 20,000
Note:-
1. The focal length of the used camera is determined as follow.
| Focal length = photo scale x Hg |
2. The height of the air craft above the ground is determined by the following application.

3. The height of the aircraft above the sea level is determined as follow.
| H= Hg + G |
Where by:-
· H = Height of the air craft above the sea level
· Hg = Height of the air craft above the ground.
· G = Ground height above the sea level.
Exercise.
An air craft flying at the same level over the terrain ground took two photos over the coastal plain that was at the sea level and mountain peak respectively, using the camera of the same focal length. The first photo scale was 1; 37,000 taken at 4500m a.s.l. and the second photo scale was 1:20,000
(a) Calculate the camera focal length.
(b) Determine the altitude of the mountain peak.
Calculate the height of an area shot by a camera whose focal length is 132mm mounted on an air craft which is flying at 10500m above the sea level. The suggested scale is 1:25000.
A vertical photograph with suggested scale of 1:20,000 has been taken by photographic view set from air craft at altitude of 5000m. The used focal length was 6” (15cm).
(a) Determine the imperial altitude of the photographed area.
(b) What metric scale the photograph may have if the photographic view set at altitude of 400m.
Calculate the flying height of an aircraft for the vertical aerial photograph at the scale of 1:20,000 whose mean ground level is 500m above the mean sea level with the focal length of
i. 210mm
ii. 152mm
PHOTOGRAPHS OVERLAPING, PHOTOGRAMMERTRY,
MAP MAKING AND DIAGRAMS SKETCHING.
1. PHOTOGRAPHS OVER LAPPING.
It becomes difficult for a single photographic view as a respective photograph to cover the very huge part of land space at once. Following this difficult several successive photographic views as well as photographs can be produced to make the whole huge part covered. Then the different successive photographs taken along the same or different photos to appear on the same photo. This photographic technique is referred to photo over lapping or photo mosaic. Thus; photo overlapping is the photographic technique of two or more successive photos combined and appear as one photo.
Or
Is the technique of making the ground that party appears on the different successive photos appear on a similar photographic by combining the different successive
photographs.
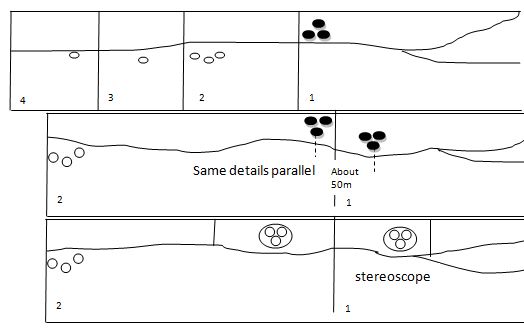
There are two types of the photo over lapping namely:
· Forward photo overlapping.
· Side photo overlapping.
1. Forward photo overlapping.
Forwards photo overlapping is made by combining two or more successive photos taken along the same flying height line.
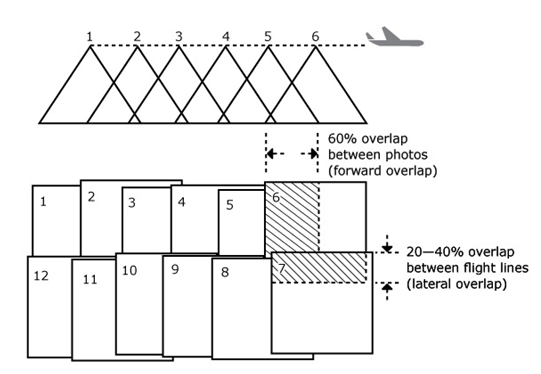
2. Side photo overlapping.
Side photo overlapping is made by combining the top and bottom parts of two different successive photographs taken along different flight lines.
3. PHOTOGRAMMETRIC.
Photographs are used to asses the geographical facts including the measurements of the geographical features measurements like area size and distance is known as
photogrammetric. How ever; photo gram metric does not stick only on measurements determination; it also involves the assessment of other geographical facts.
Photogrammetric is made possible only on vertical aerial photographs as whose scales less distorted.
Distance measurement.
Distance refers to a length of an elongated object or an interval between two parts on the earth’s surface given in linear measurement units.
The distance of any features is determined as follow.
· Photo scale consideration.
· Measure the photo distance of the object. If the elongated objects is straight, a ruler can be used. But if the objects is not straight, a divider, a piece of paper or thread can be used.
· Convert the photo distance into actual distance by regarding the photo scale.
Size determination.
Area size means the extent f coverage or bigness of a feature on the earth’s surface given in unit square.
The area of any feature is determined as follow:-
· Photo scale consideration.
· Examine the appearance of the feature on the photo.
If the figure is regular apply more directly the relevant mathematical formula with respect to the shape of the figure. Is considerably irregular, divide it into a convenient number of the mathematical figures, and then calculate the area size of each figure.
3 SKETCHING OF MAP FROM THE VERTICAL AERIAL PHOTOGRAPH.
Drawing of a map from the vertical photograph should follow the following procedure.
- Examine carefully the given photograph. If possible use the stereoscopy to get the more clear view of the objects.
- Take a trace paper and over lay the photograph.
- Separate the features of the photograph on the trace paper by producing the fine lines. This has to take into consideration the textures of the objects.
- Provide the distinctive shade on the trace paper to have clear distinction of the features on the map.
- Develop the map more clearly and associate it with important supportive details to make it well defined. The supportive details include; title key, north direction, scale and other important thinks.
- The map sketched is of the same size with photograph. It can be further develop by being enlarged or reduced.
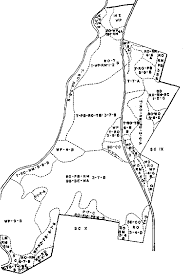
Sketched from Arial photograph
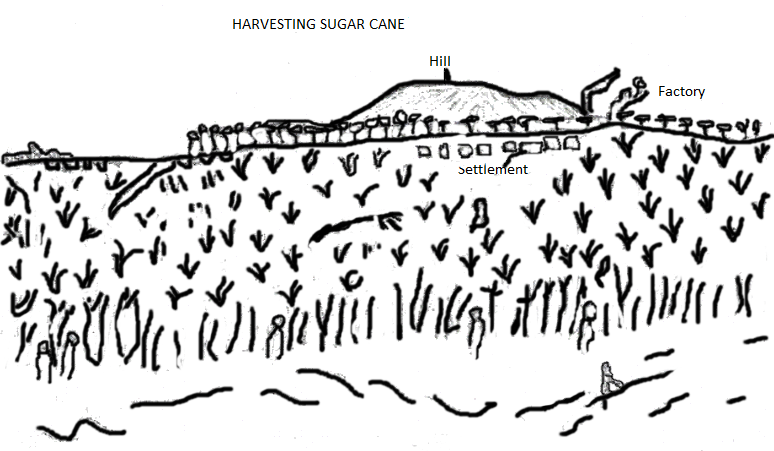
2. SKETCHING OF DIAGRAMS.
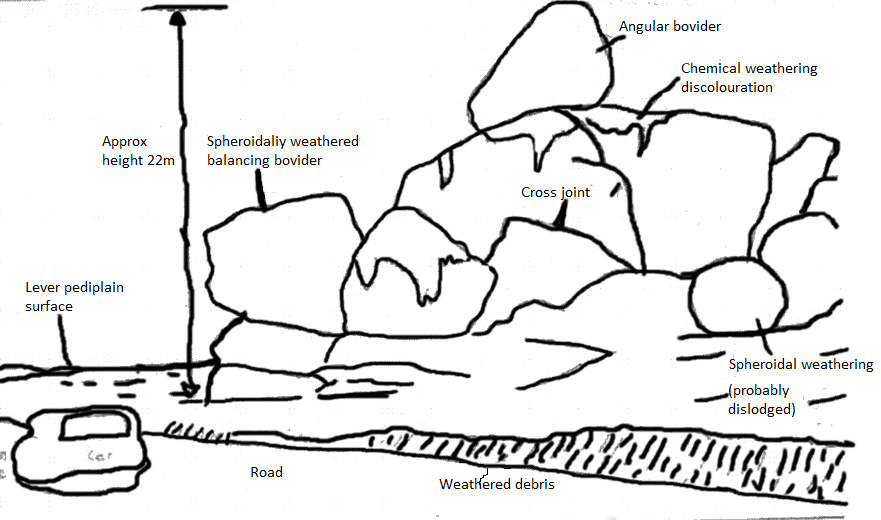
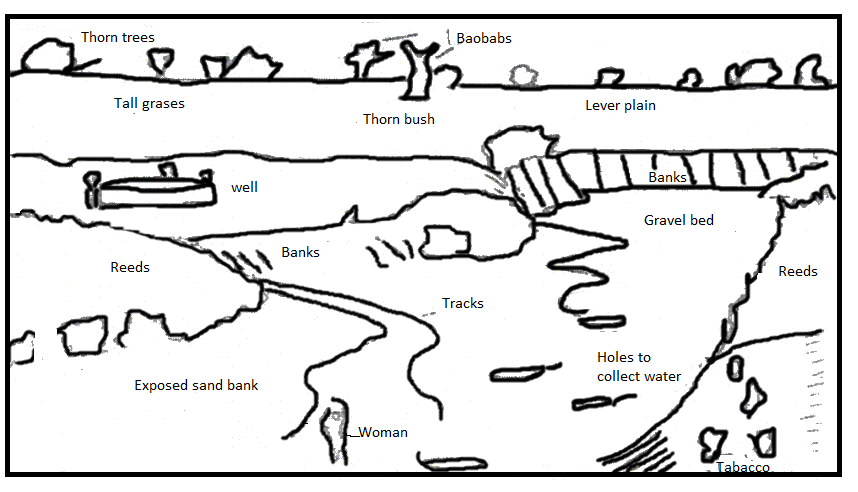
A map can be only sketched from the vertical photographs. From the horizontal and oblique photographs, diagrams can be sketched to provide visual impression of the features described from the photograph.
To draw diagram from photograph, the steps given below should be followed.
- Draw a frame work of either rectangle or square on piece of paper. The frame work should be proportional to the size of the photograph. Keep this paper aside.
- Subdivided the photograph from which a diagram to be drawn into three equal sections by faintly drawing horizontal lines a cross the photograph use pencil to develop foreground, middle ground and back ground.
- Transfer the details from the photograph into the frame work of the diagram.
- Start by inserting details in the back ground as it appears on the photograph.
- Fill the details in the middle ground and finally put in the important features in the foreground. The square drawn on the photograph guide in placing the various features in their rights positions.
- The sketch should be completed by drawing and labeling all the important features such as vegetation, land use, prominent buildings, transport and communication and then; give a suitable title of the sketch.
7.3 USES OF PHOTOGRAPHS.
Photographs are produced purposely to meet certain objectives, and these are what considered as the uses of photographs. Some of the considerable uses of photographs include the following:-
(a) They are used for map making in a number of ways as follow.
- They make confirmation of the details to be surveyed in an area to be mapped.
- They can be used for preliminary mapping of areas
- They are used for rapid survey of the remote areas which can not be reached.
(b) Photography’s provide the basis for making geographical description and analysis. It is thus; photographs make people to understand the geographical details of areas represented.
(c) They are used for making resources assessment more particularly of areas that can not be easily reached. For instance; assessment of plant species, wild animals and others.
(d) They are for military purposes and mostly used for doing reconnaissance in war.
(e) Photographs are used for making measurements assessment of the geographical features particularly for areas that are not easily reached. The assessment can be on distance, size and height.
(f) Photographs are used for engineering works. i.e. they give significant information that can be used to provide good basis in designing engineering structures.
(g) Photographs are used to make storage of instant data of like; graduation, weddings, meeting. Family celebrations and others.
(h) They are more applied for field investigation.
Strengths of photographs in geographical studies.
- Photographs permit observation of the wider area of interest at the same time.
- They are not selective as show everything that visible. i.e. they show all details of the particular area photographed as the camera does not select. Hence; photography provides a mass of details of an area captured.
- They display the absolute appearance of objects in true image as appear in real life.
- They provide the basis for geographical description and analysis of the photographed area.
- They provide easily instant data about an object for instance; the occurrence of floods, people, gathering, cars congestion etc.
- They give quick information of the required feature, as it can be compared to other sources. This is attained as a photograph takes a short period of time to be produced. For instance; photograph of an object can be produced within three minutes. Beside to this, they are less expensive to be produced
- Photographs particularly vertical aerial photos are used for map making.
Limitations (setbacks) of photographs.
- Sometimes, photographs give un required details as the camera recording images on films are not selective. i.e. they provide mass details some of which are not needed in the analysis.
- They give wrong impression on the size of objects. A big object on a photograph may look apparently larger. Hence people, who are not familiar with the objects observed on the photograph, develop wrong idea into their mind about the size of the objects.
- Photographs are subjected to a problem of scale distortion. i.e. the ration of distance to ground is not uniform all over the photo, as it gets progress silvery smaller from the fore ground to back ground or from the centre to out wards. Hence; it is difficult to judge the used photo scale. How ever; the degree of photo scale distortion is much higher on horizontal and oblique photographs; and it is less enough on the vertical photographs.
- Not all objects of the landscape can be easily seen on the photograph because of being hidden by other objects.
- Photographs do not show clearly the major directions of the photographed area.
- It is far more difficult to determine accurate measurement of the geographical features from the photograph, as the scale is not constant. It is thus; the measurements of the objects from the photographs particularly the horizontal and oblique photographs given on the estimation basis.
Similarities and differences between photographs and maps.
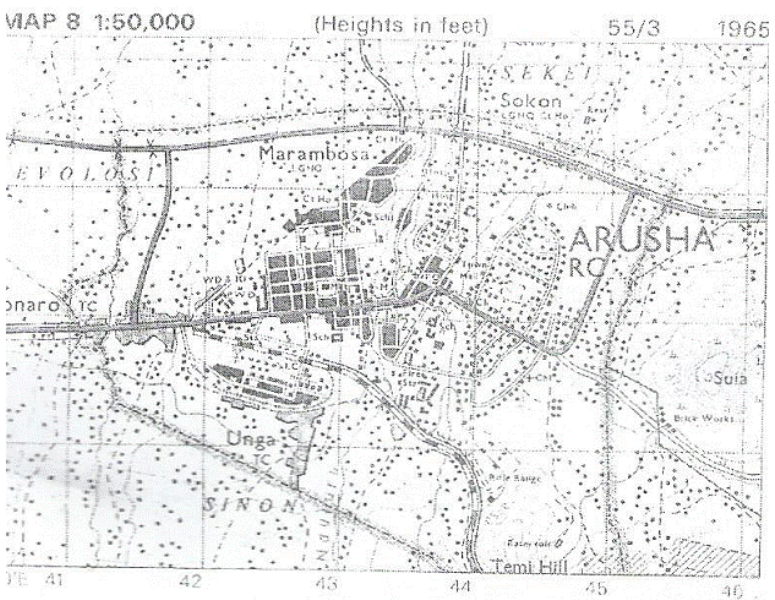
Geographical studies area partly enhanced by photographs and maps. i.e. both have similar role towards geographical studies and they are considered being reliable geographical tools. It is there fore important to understand how the two geographical tools appear similar and contrast.
Similarities.
- Both are subjected to scale as are much smaller in size compare to objects visually represented which are much large in size. i.e. they have considerable relationship of distance to the large objectives represented.
- Both give land details in terms of natural and man made features as they make representation of areas in which the features are present. Hence; provide good basis for making analysis and description of the geographical features.
- Both make visual representation of land details on flat bodies mostly the pieces of paper.
- Both show position location of the features. On maps are shown by methods of place naming, grid reference, bearing and latitudes and longitudes; while on the photograph are shown by pointing out the important parts of the photography where the objects found like; foreground, middle ground, back ground, left, right, fore right etc.
- Both show the features of landscape in three dimensions. i.e. The features on maps or photograph displayed with their height, length and width.
- Maps are selective as do not show all details of the represented area; while photographs are not selective as all details of the focused areas appear.
- Maps make uniformity coverage of the ground; while, photographs do not make uniformity cover age of the ground.
- In connection to the above point, map scale is constant. i.e. the ration of distance on the map to the ground is constant; while the scale of a photograph changes by getting progressively smaller from the principle point to outwards on vertical air photographs; or from the foreground to background on ground and oblique photographs.
- Photographs show objects of the earth’s surface on true image as appear in real life; while maps shows earth’s surface objects by means of conventional symbol and signs which normally described in the map key
- Photographs particularly the vertical aerial photographs, are used for map making while, maps are not used for photograph production.
- Photographs take short period of time and less expensive to have been produced as it can be compared to maps.
- Maps show north direction while photographs do not give.
- Map interpretation is comparatively difficult; while the interpretation of the photographs not difficult as features displayed on true image as appear in real life

7.4 TYPES OF INFORMATION FROM PHOTOGRAPHS.
Photograph interpretation is an art of examining a photograph to reflect the geographical facts of the respective photographed area. It is done by identifying and translating the features seen on the photograph to the real situation
Photo interpretation has to do with two important processes:
· Photo reading
· Photo analysis
Photo reading is the art of examining and identifying the images of as appear directly on the photo. While photo analysis is a process of translating the features seen directly on the photo to other geographical facts. However; interpretation techniques of the photographs differ depending on a type of a photograph the photo user has been given.
Interpretation of ground and oblique photographs
Interpretation of the ground and oblique photographs is comparatively easier as objects on such photographs clearly observed. However; perfect skill for interpreting these photographs requires constant practices and wider geographical knowledge.
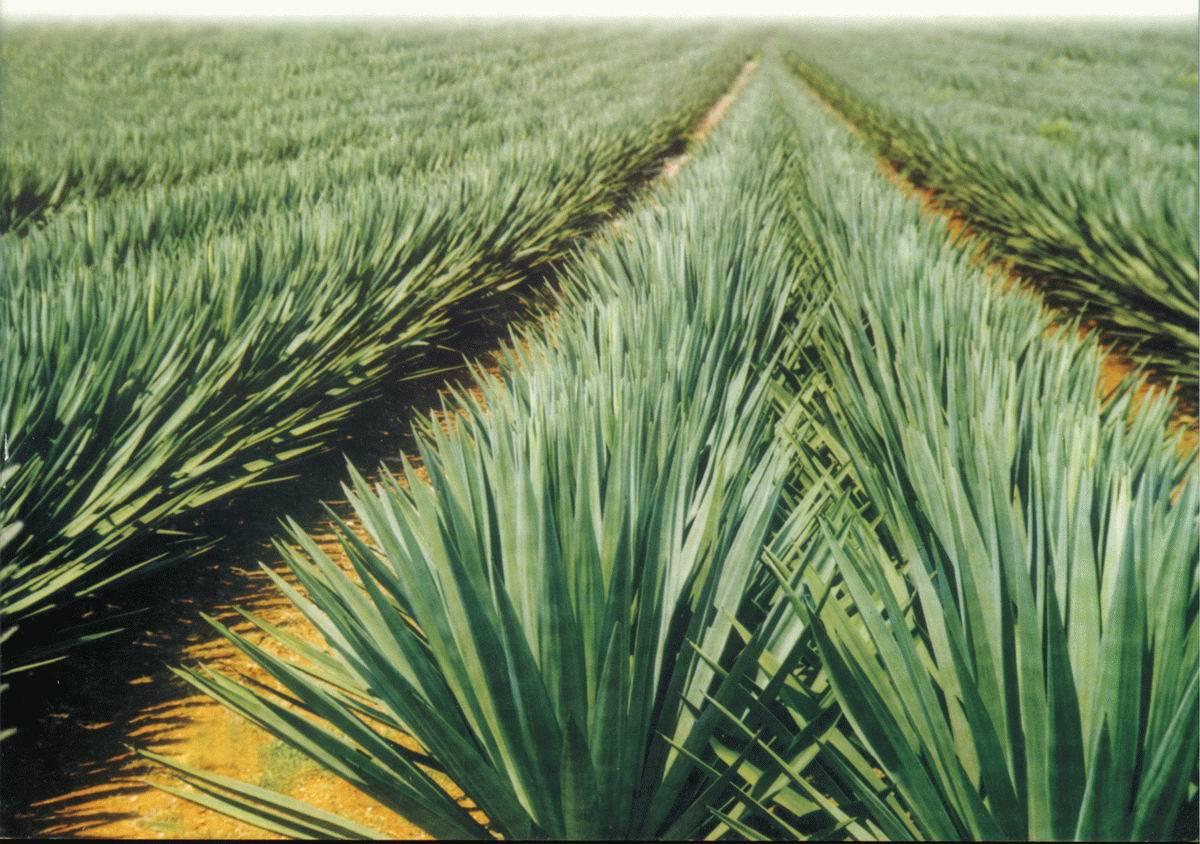
Interpretation of these photographs should involve the two basic processes of photo reading and photo analysis. By photo reading; objects on the photo in all sections are recognized. This is done directly by naked eyes as the objects clearly observed on the photograph. In photo analysis, the recognized features are related to other geographical facts for description, explanation or suggestion. For instance; with the presence of sisal on the photograph, the interpreter may judge that the area receive moderate amount of rainfall as the crop requires such a condition of water supply.
Interpretation of
Vertical aerial photograph.
The perfect skill for interpretation of the vertical aerial photographs also requires constant practices and wider geographical knowledge. It involves the same basic processes to other forms of photographs of the following;-
Photo reading; which is relatively to the identification of the objects that observed on the photograph.
Photo analysis; it is about the translation of the features recognized on the photographs to other geographical facts which might not appear directly on the photo. Photo reading is dote by the use of naked eyes directly or with the use of the special device called stereoscopy. By the use of naked eyes, enable the photo user to observe only flat views of the objects on the photo. But with the use of stereoscopy, the objects on the photo are magnified and enable the user to view the features more clearly in three dimensions by getting, their height, depth and width.
However as the objects clearly observed by the naked eyes, the interpretation of the vertical aerial photographs is aided by considering some guiding techniques based on the characteristics of the features on the photo in terms of appearance. These are what also understood as elements of the vertical photographs and include the following:-
Patterns.
It is about layout (spatial arrangement) of observable objects on the photograph with reflection to the actual area. Consideration of patterns help to recognize features and translated to other geographical facts. For instance; the pattern of the rivers on the stand the nature of relief and rocks. E.g. radial pattern if observed gives an impression that the area has rocks of uniform hardness. Scattered settlements may make people to understand that, people engage in animal keeping or scattered cultivation.
Shape:
Shape refers to the general from, structure or outline of individual objects on photo and up on the area or the regularities of the objects on the photo and up on the photographed area. This is basically helps to recognize natural and man made features. Usually regular shape indicates man made features, while irregular shape indicates natural feature. For instance; if vegetation on the photograph observed regular, reflects that, the vegetation is of planted trees.
Textures:
Texture refers to the shade pattern or smoothness and coarseness of objects on the photograph. Some objects on the photo like that of vegetation display a shade pattern which can be course or light. It is thus; the consideration of the objects textures on the photograph in relation to other consideration helps to reveal the size and concentration of objects on the photo and up on the area. For instance if plants on the photograph observed to have course texture impress that the vegetation is of closely big trees.
Colour:
Colour refers to the relative brightness of objects on the photograph. Commonly objects on the photo display colours and the common colours are of either dark or light especially on the black and white print. The colours have reflection to certain objects. For instance the dark coloured objects on the photo may reflects a road dense forest etc; while lighter colour reflects railway, grassland etc. But to recognize specific object, it requires other considerations of the objects on their pattern, texture, shape etc. e.g. the dark coloured liner object reflects a road.
Association:
Association takes into account of the relationship between features in an area. It has to bear in mind that, some objects are always found in association with others. It is thus; the identification of features that one would expect to associate with other features may provide a clue about other objects. For example the presence of ox bow lake reflects the presence of a flood plain as such associated in a food plan.
Site (location).
If the location of a photographed area is recognized the person who likely to realize other facts which also present in the area. The location is revealed by considering the feature present on the photograph.
Size.
It is about apparent bigness of the features on the photograph. The consideration help to recognize size of photographed area and relative photo scale size. For instance; if objects appear bigger on the photo; make reflection that smaller area covered and the photograph has large scale. Conversely; if objects appear much smaller impress that; wider area covered the photograph subjected to small scale.
Back ground information.
If all attempts to identify objects have field, the user of photograph must then refer to maps and written descriptions of the area.
TECHNIQUES (CONSIDERATIONS) SPECIFIC DETAILS INTERPRETATION.
1. 1. RELIEF
Relief refers to the physical appearance of an area by contrasting landforms. Relief features are many and varied in nature. The common relief features that can be easily identified on the photograph include the following:-
(a) Flat landscapes.
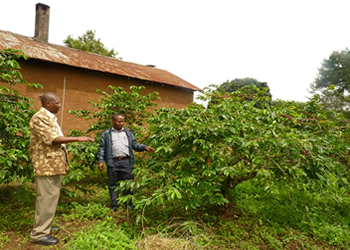
These types of relief are characterized by being extensive level or more gentle sloped. The flatland can be of lowlands or uplands. The flat land is known as plains and has altitude less that 500m above the mean level. Flatlands of high altitudes above 500m are called plateaus. To recognize if the flat land is of plain or plateau, requires other considerations for instance; if the flat land is under coffee cultivation is recognize to be of plateau with consideration that the crop requires high altitude.
(b) Dulating landscapes.
These area the landscapes which appear or observed to rise steeply or more steeply or more steeply above the surrounding area. These are of two patterns including hilly and mountains landscapes.
· Hilly recognized if the dulating landscape covers much wider area on the photo.
· Mountains recognize if the dulating landscape covers much wider area on the photo.
To describe the relief of the photographed area, the following procedure should be followed
· Identity and name the relief features observed on the photograph.
· Locate the position of varied relief forms on the photograph. i.e. whether it is on the fore, middle and back ground.
· Give the general description of the relief.
2. 2. A TYPE OF PHOTOGRAPH.
The common types of photographs given for examination purpose are of the horizontal, oblique and vertical. To identify the type of photograph given, consideration should be paid to the characteristics of the photograph relatively to the appearance of the object’s images.
Ground photograph.
This can be identified with the observation of following.
· If the photograph shows the front view of the images of objects.
· Objects get progressively smaller from the foreground towards background. If horizons see it tells, the ground photograph is of general view; but if horizons not observed it tells the type of ground photo is of close up.
· If ground covered is assessed small.
Oblique photograph.
It can be identified with the observation of the following;
· If on the photograph; images displaced as they occupy apparently linear position.
· If on the photograph; images objects have both side and top views.
· If on the photograph; objects get progressively smaller from the fore ground to back wards.
· If the photo shows horizon; it is judged to be of the high oblique photo not observed, it can be judged as low oblique photograph.
Vertical aerial photograph.
It can be identified with the observation of the following;
· If on the photograph; objects have the top views as the photographic views was vertically directed towards the landscape.
· If on the photograph; objects are not distorted in size following the uniformity coverage of ground on the photograph.
· If ground covered is assessed large.
3. 3. THE SITE (LOCATION) OF THE FEATURES.
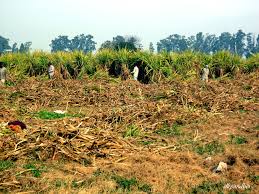
It is considerably to where the photograph might have been taken. In order to suggest where the photograph might have been taken; the user should have enough knowledge on the distribution of human activities; and manmade and physical features with in Tanzania, East Africa, Africa, and else where in the words. As for example; the type of a crop grown will give a clue where the photograph might have been taken. For instance, If the photograph shows sugar can plantation, it can be suggested that, the photograph might have taken in Mtibwa, Kilombero,Moshi and Kagera. It is so as the areas mentioned, are under cultivation of sugar cane in large scale.If the photograph shows water falls, it can be suggested that, the photograph was taken from; Kidatu, Kalambo, and Tana. It is so as the mentioned areas have the HEP stations using waterfalls to generate the power.
4. 4.TIME AT WHICH THE PHOTOGRAPH WAS TAKEN.
The time at which the photograph might have been taken is complex matter. This is because; no exactly time can be appointed out by the photograph. It remain to be a matter of generalization on whether the photograph was taken in the morning noon or evening. There are two suggestions for the time:
(a) Observation of the shadow of the objects.
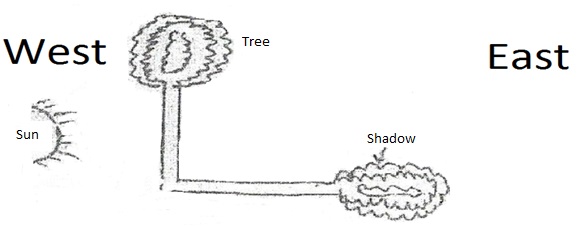
· In the morning; shadow casts long and lies western side. This is is because; the sun is in eastern side. Thus the diagram if it could be of photograph would impress that the photograph was taken during the morning.
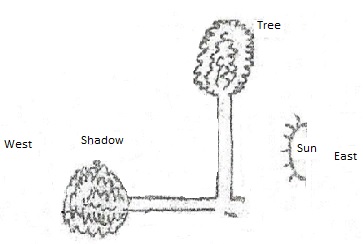
If the photograph was taken during evening time, its shadow lies eastern side because the sun is in western side. The diagram below if could be of photograph, would impress that, the photo was taken in the evening time.
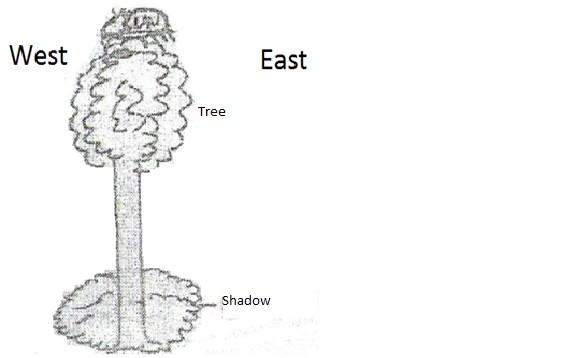
· If the photograph has been taken at afternoon, its shadow lies around object. This is because the sun is over head at that particular period of time.
(b)Observation of the human activities.
It is much to the observation of agricultural activities carried out on photograph. Human activities particularly of agriculture are carried out with respect to time consideration. It is thus; if on a photograph a certain human activity is observed, can be considered to reveal the time at which the photograph might have been taken.
(c)Brightness of the image features.
This has ideal reflection to the relative at which the photograph might have been taken.
· More bright images reflect the photograph to have been taken in the mid day time.
· Less bright images reflect the photograph to have been taken in the evening.
· Dark images reflect a photograph to have been taken during the night.
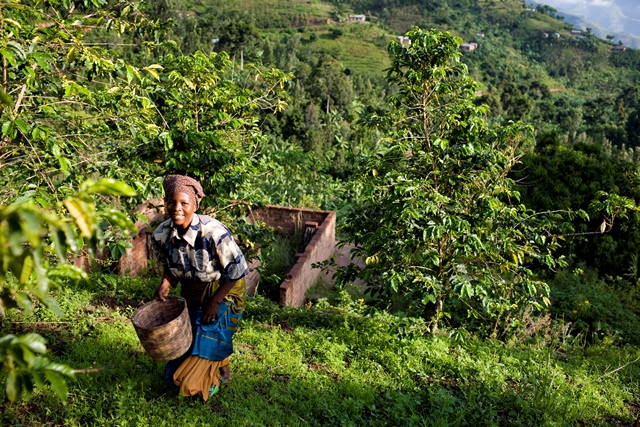
5. SEASON AT WHICH THE PHOTOGRAPH MIGHT HAVE BEEN TAKEN.
Seasons are of two dimensions including rainy and temperature seasons. Rainy seasons are two and include wet and dry. Temperature season are also two including hot (summer) and cool (winter). It is possible to judge the season in which the photographs was taken. The following considerations if observed of photographs may help to asses the season.
· Bright clear skies with dry vegetation could indicate dry period or season.
· Luxuriant vegetation, young crops in the fields flowering plants and rainy clouds in the sky could indicate a went season.
· Winter would be reflected by the presence of snow on the ground.
· The type of cloth worm by people can also indicate the prevailing temperature season whether summer or winter e .g. The warm of thick clothe reflects winter season.
6. 6. THE POSITION OF CAMERA MAN.
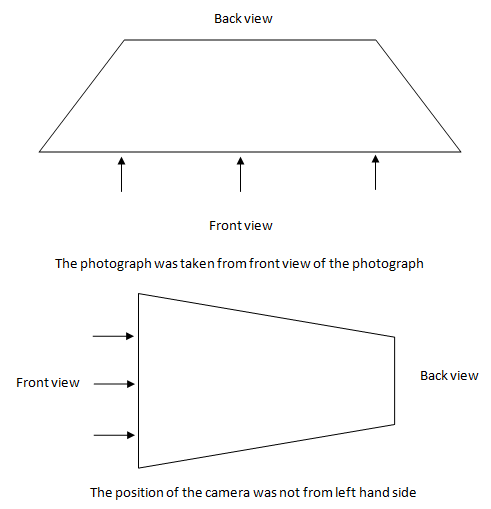
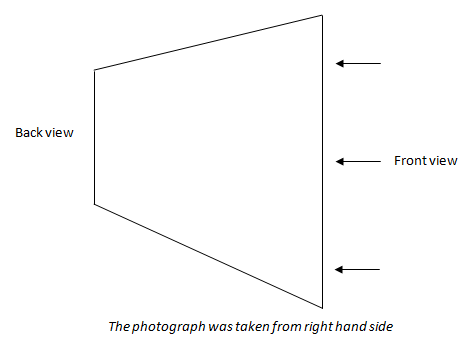
To asses the position of the camera man or position of the photographer do the following:-
Study the photograph and observe which part the images of objects in the photograph are larger and decrease towards far from the fore ground. The part which shows big objects is the place (direction) from which the photograph was taken.
7. 7. SOIL
It is possible to recognize the nature of a soil found in an area by studying a respective photograph. Nature of soil recognized by taking into consideration the following if appear on the photograph.
(a) Kind of crop growing in an area.
Some crops growing on certain soils. It is there fore, the consideration of crops if observed on the photograph may help ideally to deduce the soil type. Some cases for may include the following:-
· Paddy; reflects impermeable heavy clay soil as the crop growing on such type of soil.
· Wheat; reflects light clay or heavy loam soil.
· Maize mostly reflects deep rich soil. However, maize grown on a very wide range of soil types.
· Tea and coffee reflect; volcanic deep fertile acidic soil which is also well drained.
· Cocoa suggests; deep well drained light clay or loam soils.
· Coconuts and cashew nuts reflect that the area has sandy soils.
· Horticultural crops reflect loam soils the crops grow well on such soil.
It is thus; the students as well as other photo users must have wide knowledge on soil requirements for varied crops apart from the ones given.
(b) The topography of an area.
The consideration helps to reveal the depth and drainage of the soil.
· If the photograph shows level land the soil is assessed being deep poorly drained.
· Sloppy topography reflects shallow well drained soils.
(c) Natural vegetation.
Consideration of vegetation helps to assess fertility and depth of the soil.
· The presence of the dense forests; reflects deep fertile well drained soils.
· Poor vegetation reflects poor soils.
8. 8. WEATHER AND CLIMATE.
Whether and climate do not appear in photographs more directly. In order to state the climate of a given area portrayed on the photograph, observation should be made into the following their conclusion:
(a) Kinds of the crops observed on photograph.
· Observation of coffee and tea reflects cool wet climate.
· Cocoa as mostly grown in equatorial environment, if observed on the photograph reflects hot wet climate.
· Sugar cane would 1mean the area has warm wet climate.
Sisal and cotton reflect dry season ( minimum rainfall)
It is thus; the students as well as other photo users must have wide knowledge on climate requirements for varied crops a part from the ones given.
(b) Vegetation.
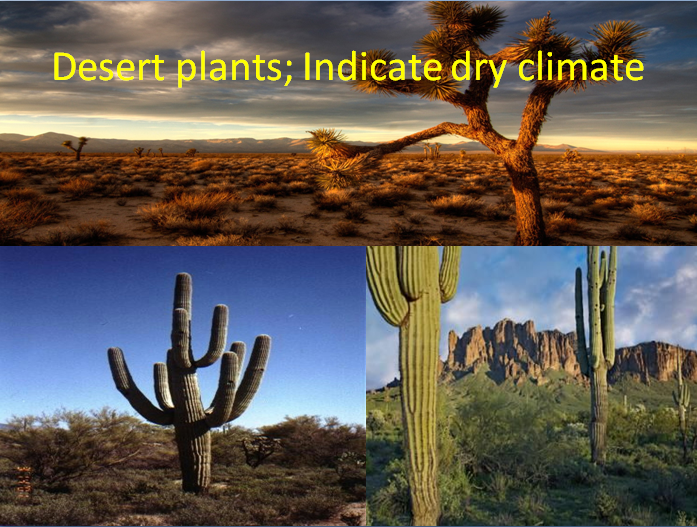
Plant covers much related to climate and thus; if vegetation observed on the photograph may helps some one to suggest the likely climatic condition especially on the amount of rainfall.
· The observation of forests reflects heavy rainfall.
· Grasses baobab and short trees suggest low annual rain fall.
9. 9. DRAINAGE
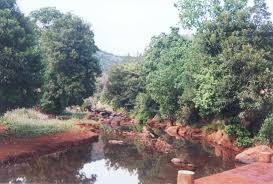
Drainage is the processed by which water is removed from the land to a lake or to the sea by a system of water flow mostly of rivers. The systems which make the removal of water known as drainage feature. The common drainage features include; rivers, lakes, seas, swamps and others.Water features appear bright in photographs and are easily recognizable on all types of photographs. It is thus; photographs may helps to assess drainage features and their different related aspects as follow.
· The presence of a body of flowing water reflects a river.
· The presence of a body of stagnant water may reflect a lake or swamp. To reveal the drainage feature if is of a lake or swamp, requires the making of other considerations.
· The presence of water falls and rapids indicates that the river is flowing in a steep region (landscape).
· Meanders show that the river is in the middle stage or old stage. Beside to this associated with the presence of flood plain
· The presence of many channels or distributaries before the rivers enter the ocean or lake indicates river delta.
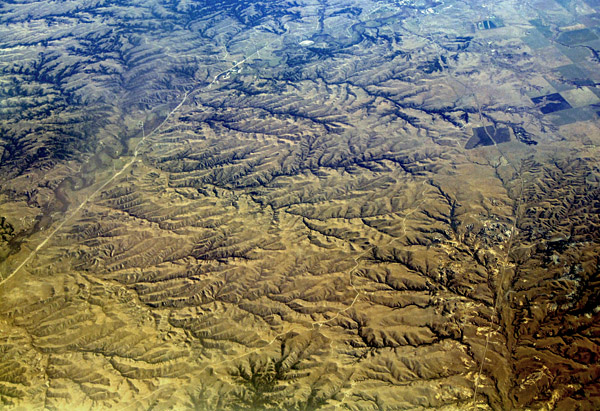
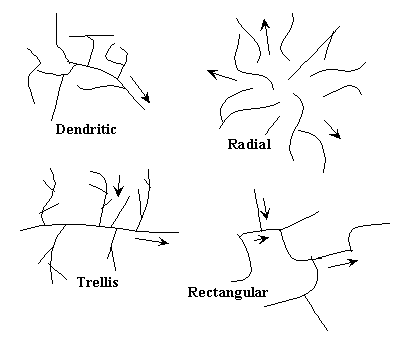
Drainage patterns of rivers are clearly observed on vertical aerial photographs and the following cases of related can be deduced.
· If streams and main rivers form roughly a shape of a tree like structure, dendritic pattern deduced from the photograph.
· If streams appear to join to the main river at right angles, trellis pattern is recognized.
· If streams appear to diverge to different directions from the conical shaped upland radial pattern is recognized.
VEGETETION.
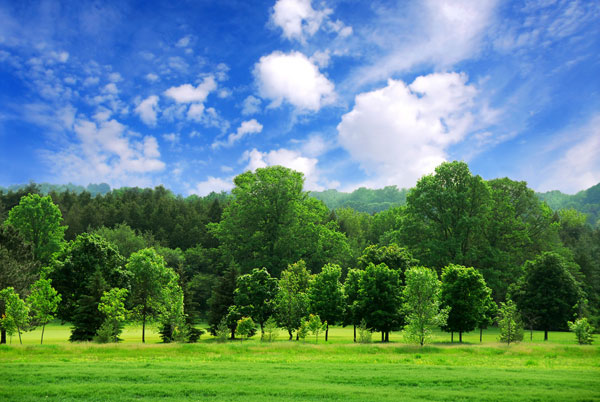
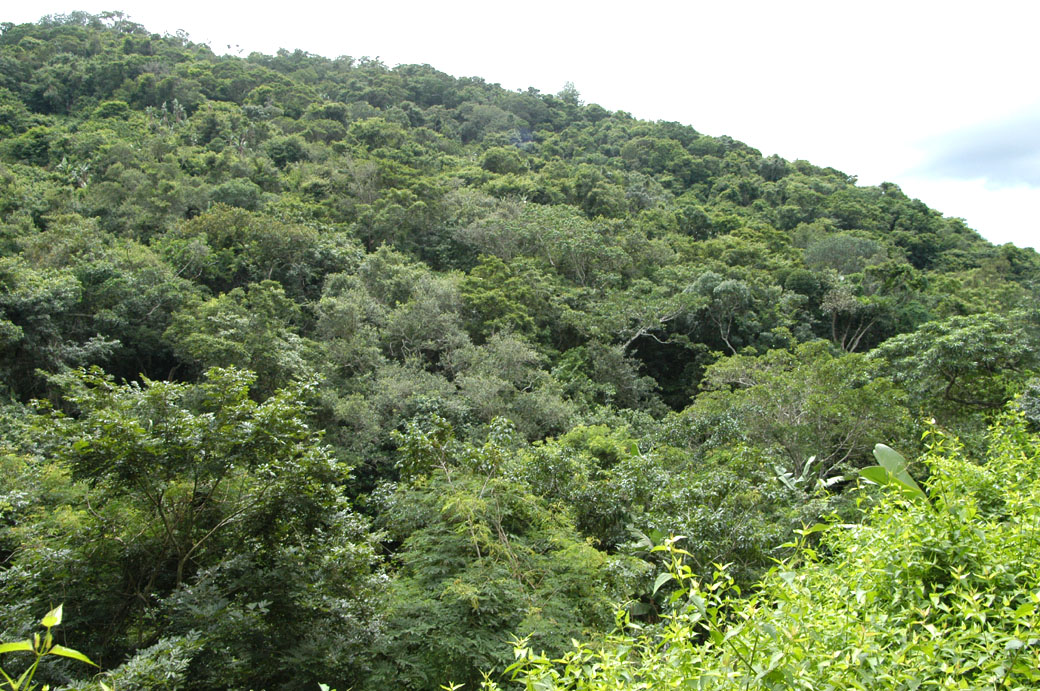
These are the plant covers which develop under natural conditions in a particular climate, relief and soil. However; due to human activities, most of areas have lost their natural (primary) vegetation. The vegetation we commonly see in photographs with reflection to actual areas are likely to be secondary or derived.
The description of vegetation from photographs should take into account the following aspects.
· Types of vegetation .e.g. forest, thickets, scrub, grass and marshes.
· Characteristics of plants observed on the photographs .i.e. describe the height and shape of the vegetation e. g. tall or short trees. In same cases a close study of the photograph can be reveal whether the leaves are broad, needle shaped or thorny.
· Try to identify some species of trees which are easily identifiable, e.g. the baobab or acacia trees.
· Relate vegetation types to climatic region, e.g. tropical rainforests, tropical grassland and desert vegetation.
· Try to distinguish the planed vegetation from natural vegetation. Planed trees usually appear in patterns or in rows and the trees appear of the same species.
Note.
(a) All aspect given above are so much useful in making description about the vegetation. However; description depends on recommendation of the question.
(b) It is also important; the description of vegetation should consider the knowledge from other disciplines like biology.
11. ECONOMIC ACTIVITIES
These are means of earning lively hood by the people in the habitable areas. Some of the economic activities easily identified from the photograph by taking into reasonable consideration. The activities and their related suggestion aspects include the following
(a) Farming.
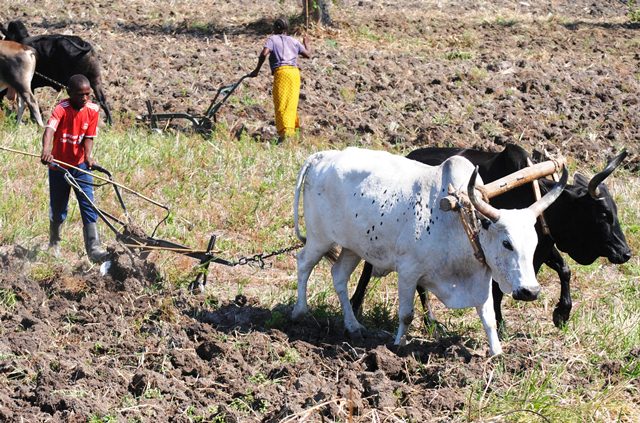
Farming includes crops cultivation and livestock rearing. These could further be subdivided into subsistence and commercial farming. The guidelines on how to identify types of farming from photographs include the following;-
(i) Subsistence farming.
Evidence to look to identify this type of farming include the following.
· The presence of temporary houses.
· The land is normally divided into small portions.
· Observation of mixed cropping.
· The use of simple farm implements such as machetes and hoes.
· Field may appear separated by hedges.
(ii)Tradition livestock farming.
· Cattle grazed on grassland.
· Large field divided into paddocks.
· Windmills for water supply.
· Presence of water tanks, ponds reservoirs in the dry areas.
(iii) Plantation farming.
This form of farming is recognized by observation of the following on a photograph.
· A single crop covering extensive stretches of land, e.g. sugar cane, tea, coffee, sisal, wheat etc.
· Presence of storage facilities in a formed area.
· Many labours in the fields e.g. many people picking tea or coffee.
· Nucleated settlements within the farm. These are usually for the workers.
· The presence of processing factories with in the farm.
· Presence of feeder routes within the farm.
(b) Lumbering.
Lumbering can be recognized by the observation of the following:
· People cutting trees with power saws on the photo.
· People loading timber into Lorries.
· Logs poled near a sawmill.
· Large forest clearing with tree stumps.
(c) Industrial and mining activities.
In photographs industrial and mining activities are donated by the presence of the following:
· Factory buildings with tall chimneys.
· Nucleated settlements for workers.
· Large open pits, large excavators, and Lorries carrying of loads of rocks (this show that open – cast mining is being carried out.
12. SETTLEMENTS.
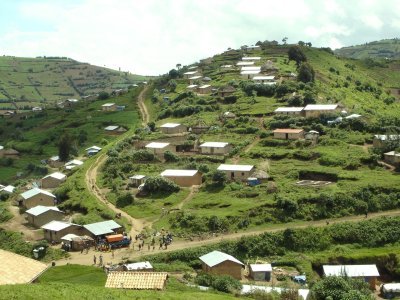
A settlement is a group of dwellings where people lived and interact with one other. Settlement sub divided into rural and urban dwellings.
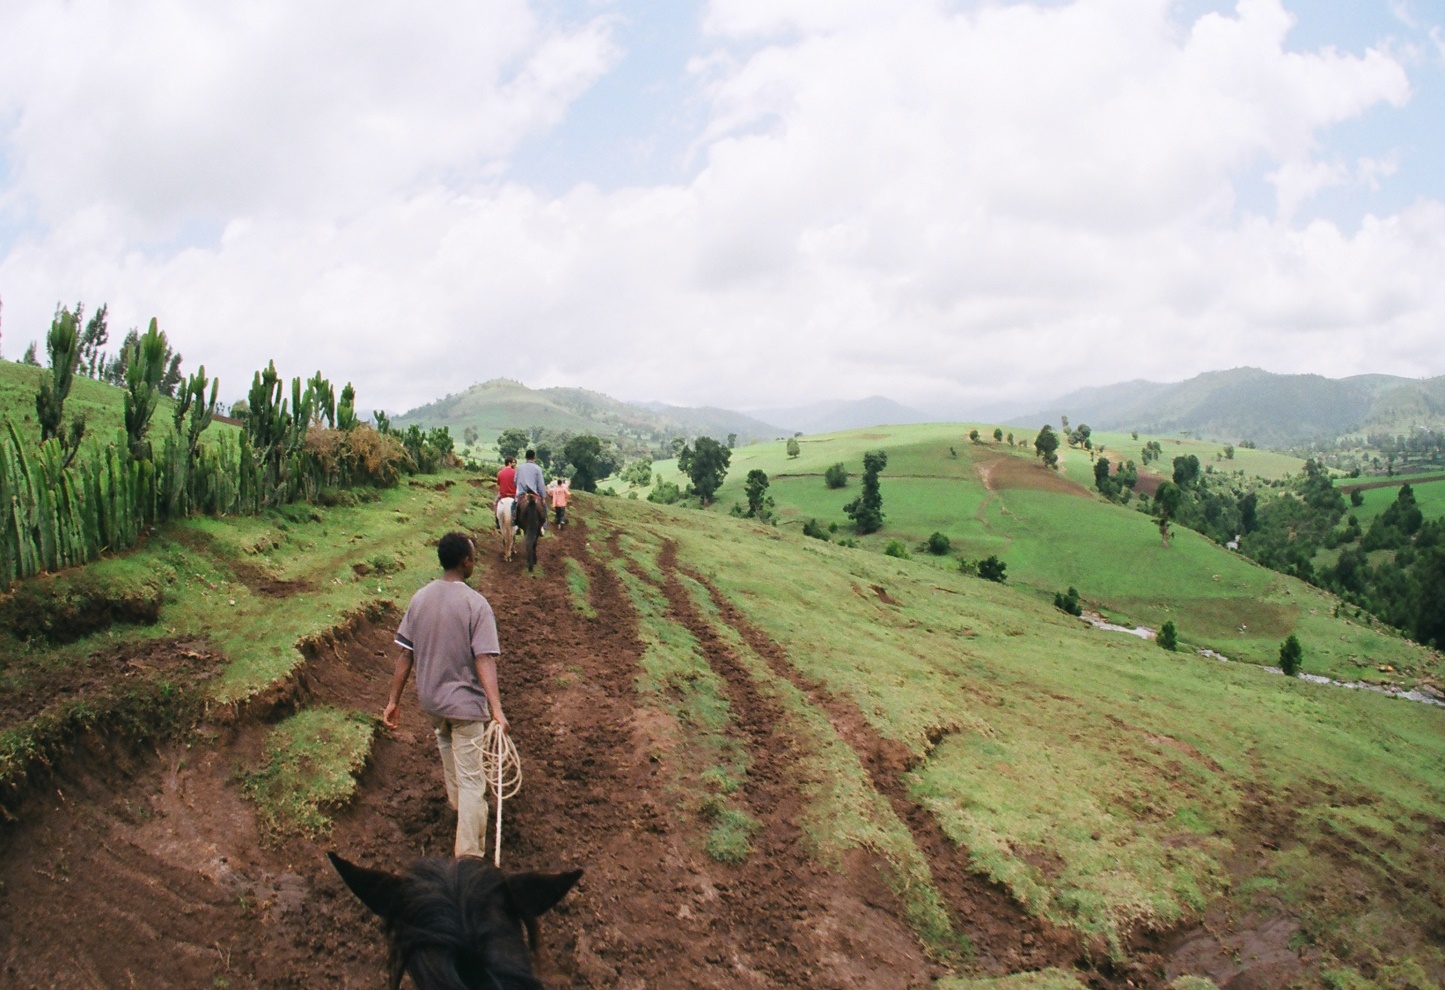
Rural settlements recognized by the observation of the following;
· Simple architectural designs of semi-permanent houses.
· Evidence of farming or finishing activities.
· Uneven and unplanned distribution of dwellings.
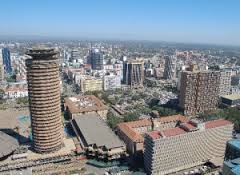
Urban settlements can be identified by:
· Permanent buildings which are dominant.
· Regular street patterns.
· An industrial part of the town which has many large buildings
· High population densities.
· Heavy motor vehicles traffic.
· Port facilities such as docks, cranes, warehouses and containers.A well developed communication network.
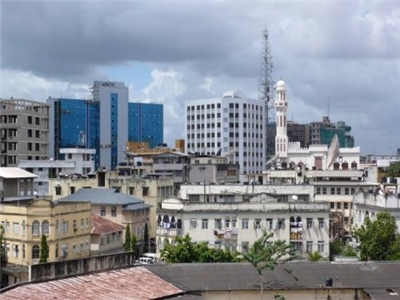
TRANSPORT AND COMMUNICATION.
Various forms of transport are shown differently. The following are indicators of transport :
(a) Motor transport, shown by either motor vehicles or roads.
(b) Rain transport, indicated by railway line with or without trains.
(c) Air transport, indicated by the large flat tarmac piece of ground with buildings on one side, and control tower (air craft may be parked on the runway near the airport buildings.)
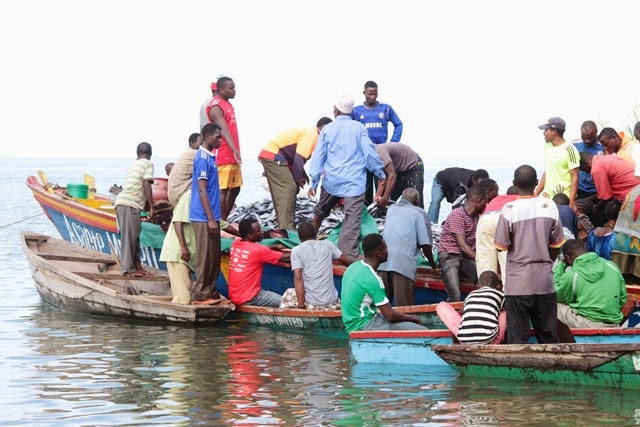
(d) Water transport, indicates by the presence of boats, ships and large water vessels.
(e) Facilitates such as telephone lines, satellite mast indicate the presence of communication services.
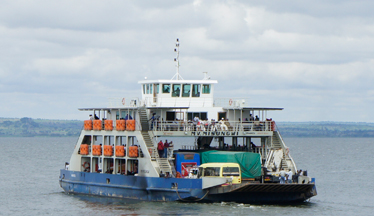
Water transport
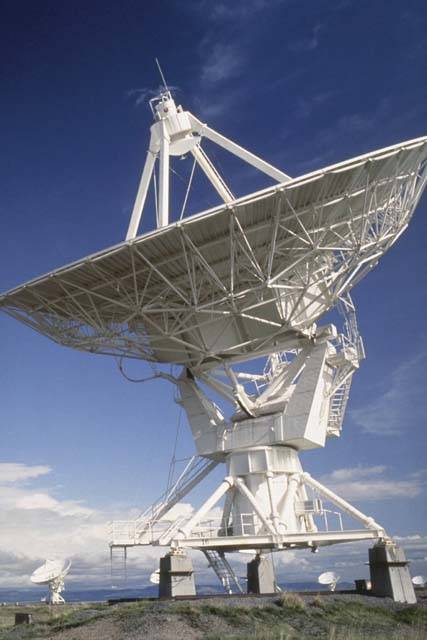
Satellite dish
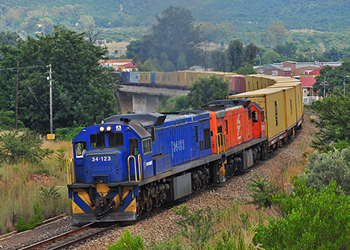
Railway transport
Leave a Reply